Search in documentation
Discontinued products
Plugin installation
Installation is the same as for our other plugins. The plugin is installed using the ThisPlugin Manager. More information on where to get this free plugin and how to install it can be found at this link.
To install the plugin, you must first purchase a paid plugin license. You can buy it from the plugin presentation page on Gumroad. Then you add a license in ThisPlugin Manager and the plugin will be automatically installed in the latest version. After that, all you need to do is activate and set it up.
Plugin overview
The Discontinued Products plugin will help you retain traffic from products that you no longer sell for any reason.
In addition, it increases the conversion of visitors to your store who visit the pages of these products by offering them alternatives to these products.
The plugin comes with default settings, and to use it, all you need to do is set the status of the products you no longer want to sell. Of course, you can customize all parts of the discontinued product to your liking. Both in content and appearance.
The plugin is set up and ready to use right after installation (we use settings that suit most users). But of course you can customize the settings according to your own use case.
Settings
Settings are divided into two parts. Text settings and Display settings.
Text settings
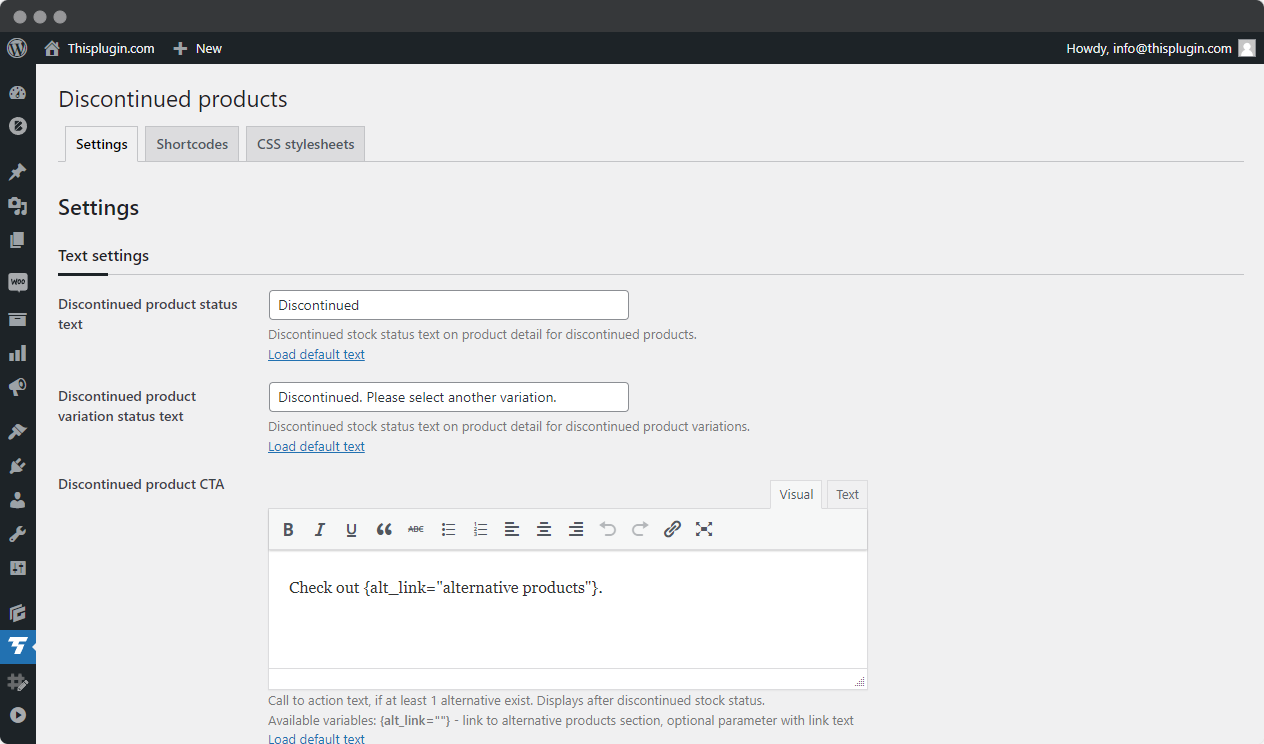
In the text settings, you can set all the texts used for discontinued products. You can set the name of the status, the main notification text, the call to action, the name of the tag on the product list, and also the title of alternative products.
All settings include clear instructions on how to set the text and an option to return to the original setting via the Load Default Text link.
Display settings
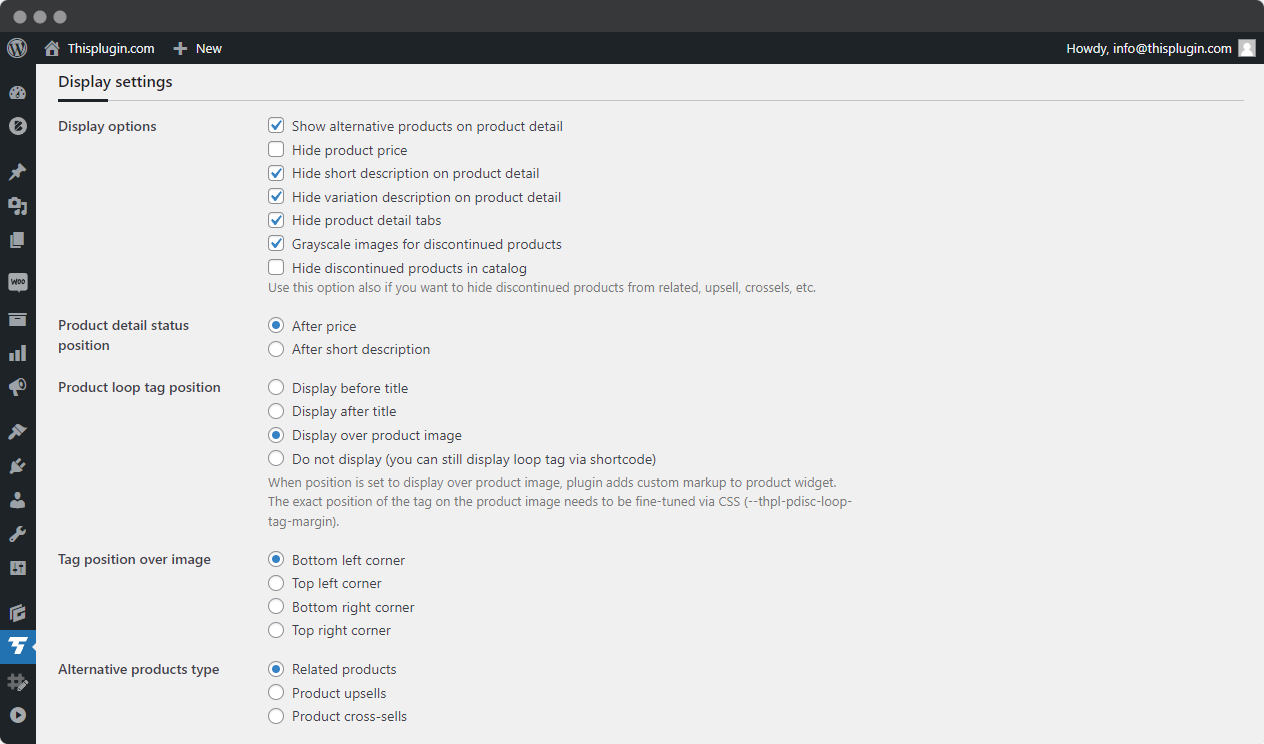
Under Display options you can set the following:
- Show alternative products on product detail
- Hide product price
- Hide short description on product detail page
- Hide variation description on product detail
- Hide product detail tabs
- Grayscale images for discontinued products
- Hide discontinued products in catalog
The individual options are easy to understand at first glance from the text itself. They enable or disable certain specific parts of the product template.
In the next section under the name Product detail status position, you can set the status position on the product template after the price or after a short description.
In the third part you can set the position of the tag on the product card (product loop). There are 4 options to choose from:
- Display before title
- Display after title
- Display over image
- Do not display (you can still display loop tag via shortcode)
If you choose to display above the product image, you can also choose a specific position (card corner) for the tag.
The position of the tag on the image should be fine-tuned using CSS.
Finally, you can choose from which products to select alternatives – related products, product upsells and product cross-sells.
These are common settings for all products. You can override these settings in the details of each product.
Change of product status
In order to mark the product as discontinued and use the Discontinued settings, you must first change the status of the product from In Stock or Out of Stock to Discontinued.
Simple Products
If the product has the Manage Stock Level (Quantity) option checked in the Inventory section, you must first uncheck this option. Then you can change the Stock status from Current to Discontinued.
Variable Products
For variable products, you must proceed in the same way, but for each variant.
Settings for individual products
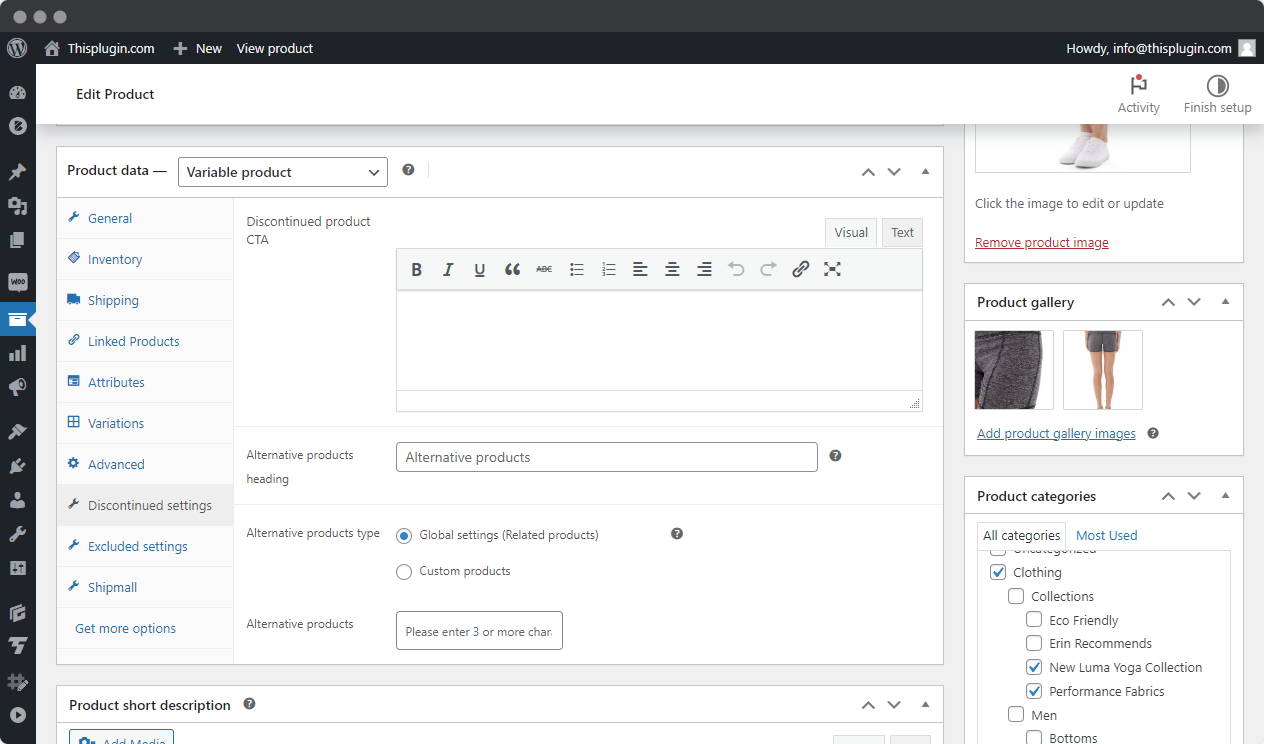
You can set this individually for each product (on the product detail page in admin):
- Discontinued Product Call to Action
- Alternative Products Heading
- Alternative product type – you can choose to use the global setting or select specific products by full-text search by name.
Bulk operations
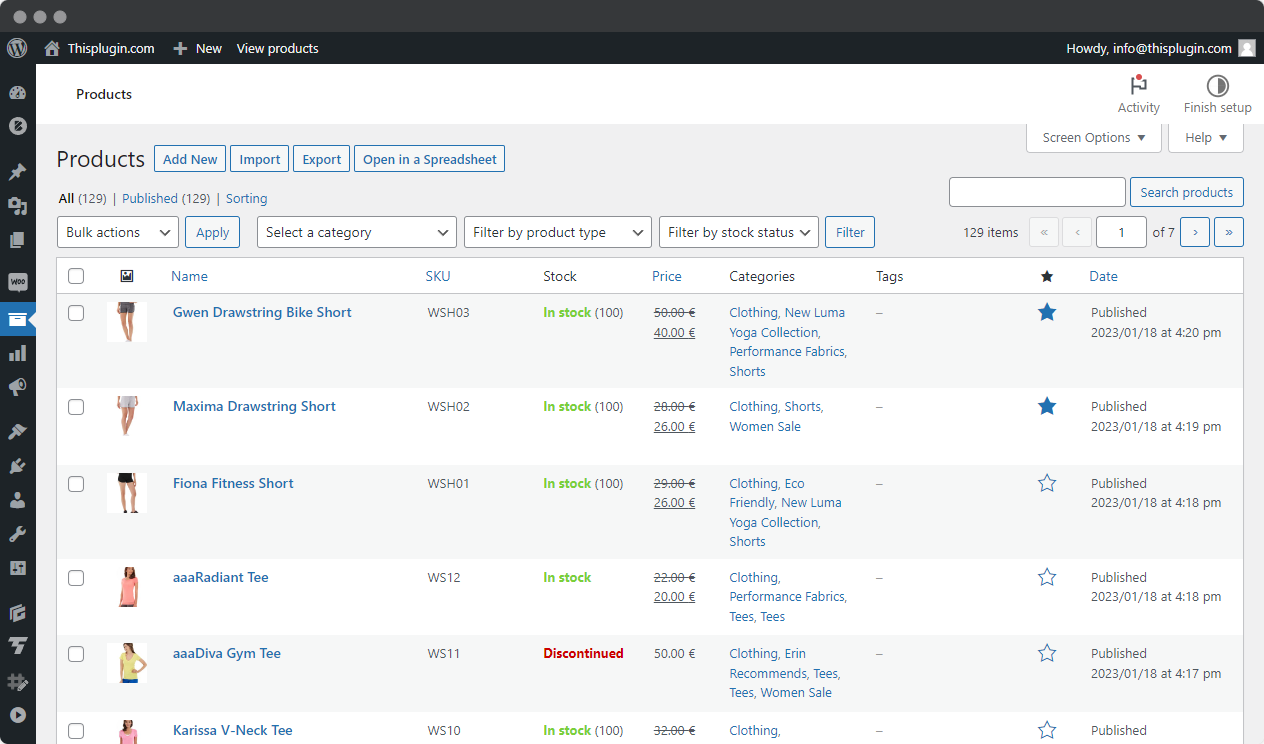
You can also change the product status using bulk operations (on the product list). Discontinued status can be found in the stock status settings (In stock?).
Shortcodes
In this tab you will find all available options for shortcodes. These will allow you to completely customize the content of the Discontinued Products template to your liking, e.g. using the Page Builder.
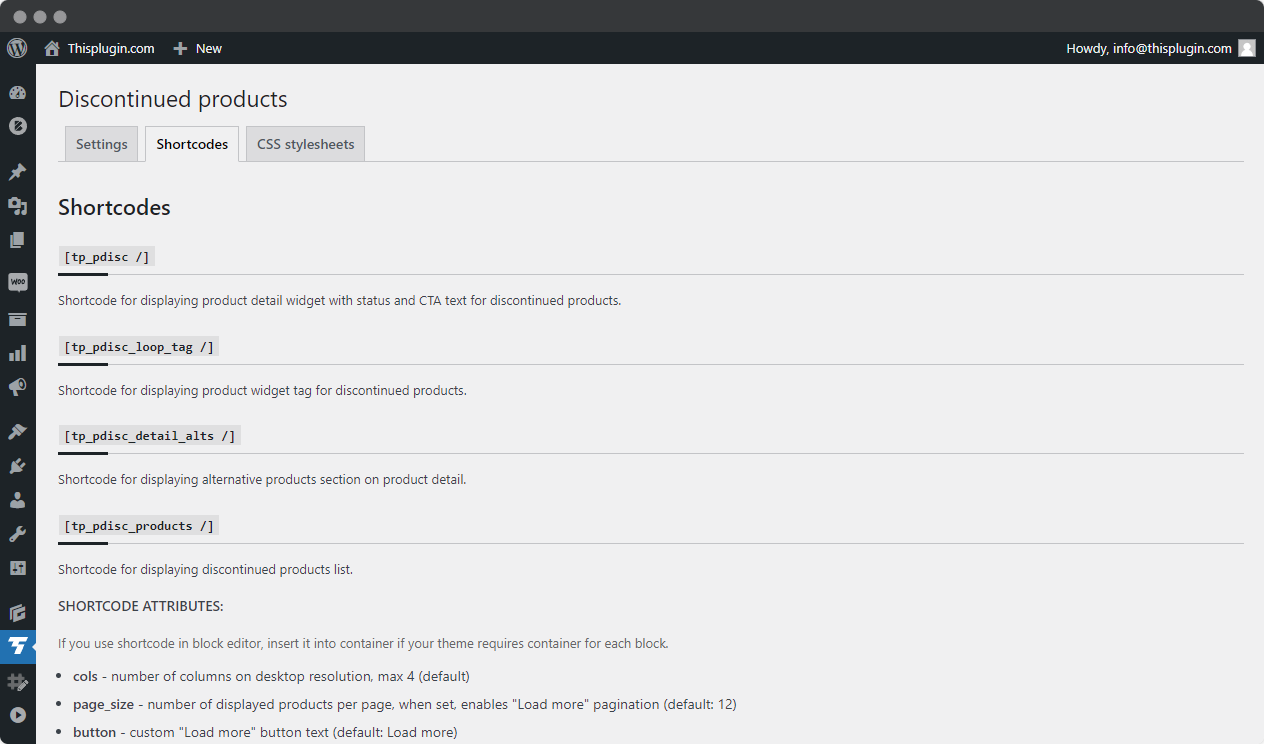
We offer you the following shortcodes:
- Shortcode to display product detail widget with status and CTA text for discontinued products.
- Shortcode to display product widget tag for discontinued products.
- Shortcode to display alternative products section on product detail.
- Shortcode to show discontinued products list.
You can use attributes to change the last shortcode for displaying the list of discontinued products:
- cols – number of columns on desktop resolution, max 4 (default).
- page_size – number of products displayed per page, when set, enables “Load more” pagination (default: 12).
- button – custom “Load more” button text (default: Load more).
- number – when page_size is not set, maximum number of products to display, -1 (default) for unlimited.
Example with attributes: [tp_pdisc_products cols="3" number="3" /]
CSS stylesheets
This tab gives you full control over the CSS of your widget on the web. However, these settings are intended for advanced users and developers only.
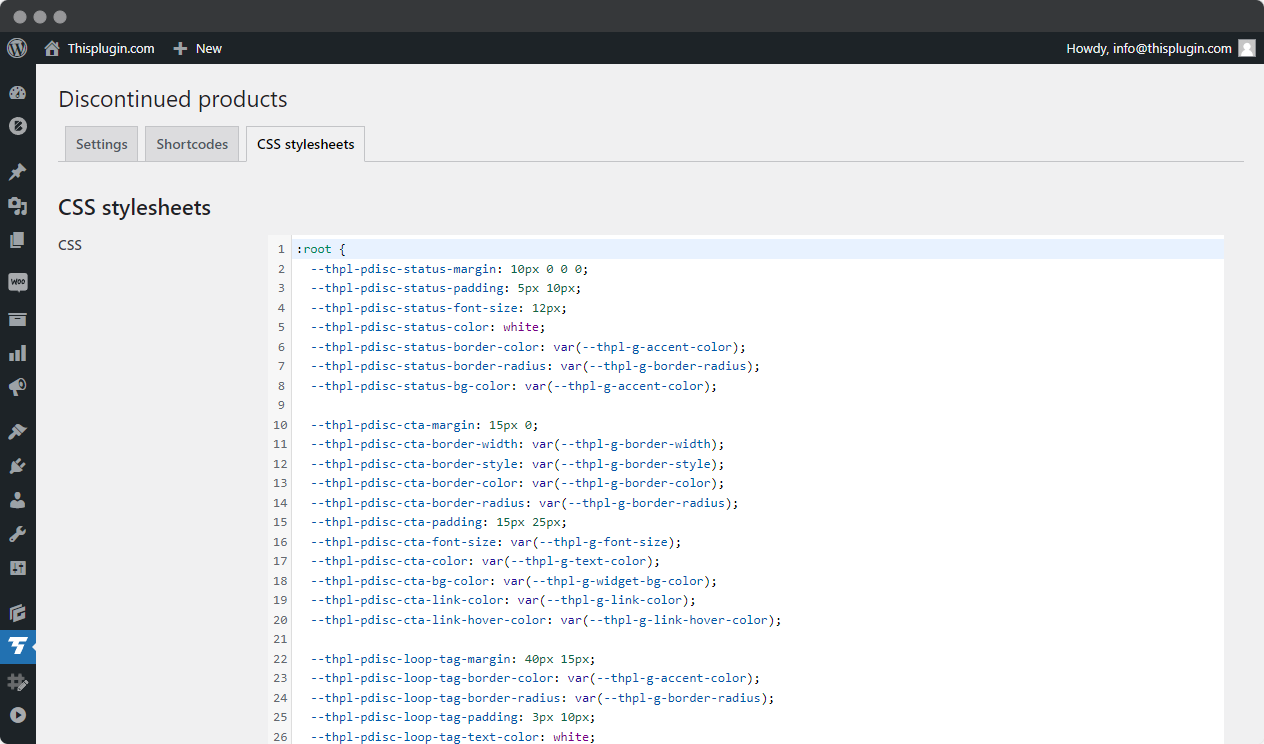
We recommend beginners to change the look of the widget using Global Styles in the ThisPlugin Manager.
If you make a change that you are not happy with, you can always restore the default CSS that comes with the plugin by default. Just click on the Load default CSS link.
Don’t forget to save your settings by clicking the Update button.
Need help?
Submit a ticket
Need help setting up the plugin? Submit a ticket in our support center and we will help you.
Feature request
Didn't find the feature you were looking for? Send us a request and we will consider adding it.
Changelog
The changelog lists all the new features, enhancements and fixes already released.
Roadmap
In the roadmap you will find a list of all planned or user-proposed features.