Search in documentation
Free Shipping Bar
Plugin installation
Installing the plugin is free. Before installing the plugin, you must first obtain its free license from Gumroad. The presentation page of the plugin will take you to Gumroad, where you can get the free license.
To apply the plugin license, you need to have free ThisPlugin Manager installed. Add the Free Shipping Bar plugin license to it. The plugin will automatically download the latest version. After activation the plugin is ready to use.
Plugin overview
The Free Shipping Bar plugin will help you quickly and easily add an option to increase the average order value on your e-commerce site. This option is considered one of the basic tactics for increasing AOV. We recommend that you add it as the very first one.
Setting up the plugin itself is very easy and can be done in a few minutes. You can customize the plugin to match your brand. The plugin also offers a number of placement options, including the ability to place via shortcodes.
The plugin is set up and ready to use right after installation (we use settings that suit most users). But of course you can customize the settings according to your own use case.
Plugin settings
After activation, the plugin can be found in the main menu under the name ThisPlugin or your own name you set using the Whitelabel feature of the Plugin Manager.
In the settings you will find general settings, widget display settings, text settings.
General settings
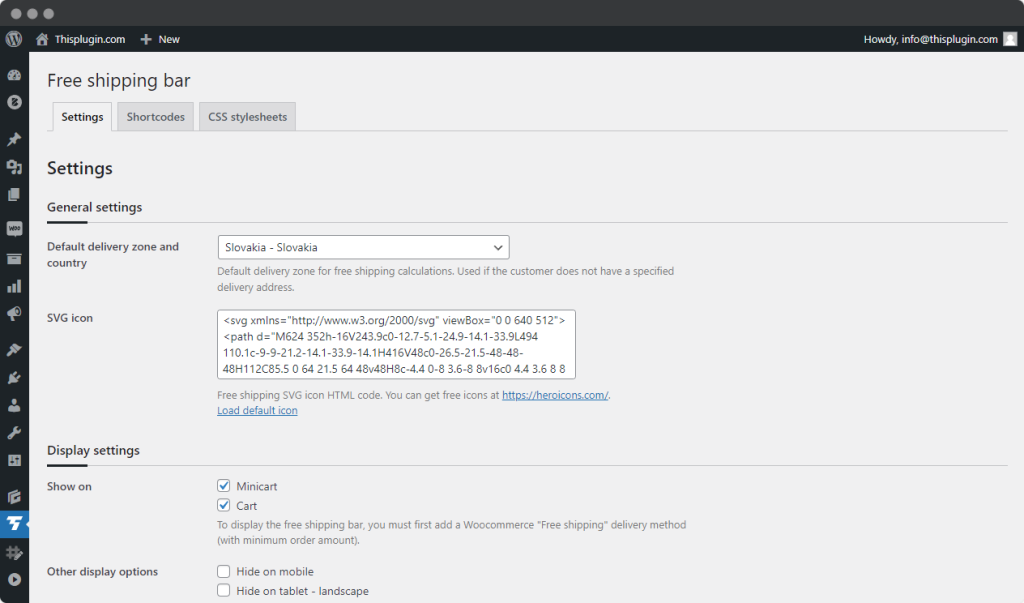
Default delivery zone and country
In the General Settings section, you can set the “Default shipping zone and country” parameter. This is the default delivery zone for calculating free shipping. It is used when the customer does not provide a shipping address.
SVG Icon
You can add free shipping SVG icon for you widget (a truck for example). You can download free svg icons from Heroicons or the free Fontawesome library. Choose an icon, copy the SVG and paste it into the box.
Load default icon
If you want to restore the original SVG icon, just click on the Load default icon link.
Display settings
In this settings section, you can set where you want to display the Free Shipping Bar widget.
You can display the widget in two basic positions. For minicart and cart. You can set other positions using shortcodes.
At the same time, you can specify on which devices the widget should appear in these locations. By default, the widget appears on the desktop. You can set the widget to hide for mobile and tablet (portrait and landscape).
Text settings
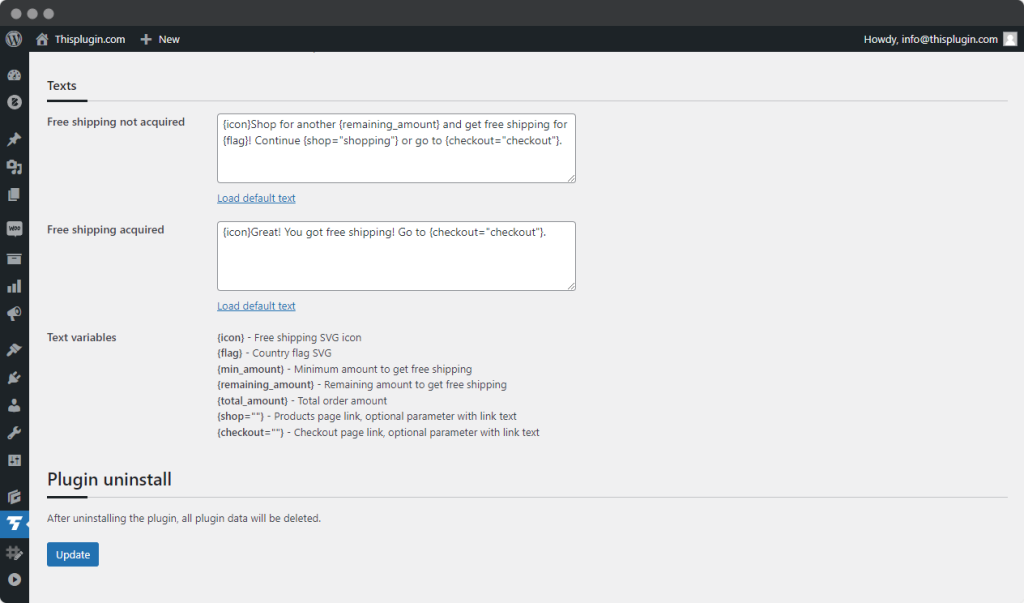
Free shipping not acquired – Depending on your display settings, this message is displayed in Minicart (with progress bar) and Cart (simple text) when customers do not qualify for free shipping. This total missing amount can be added using the available text variables. Example: {icon}Purchase for another {remaining_amount} and get free shipping! Continue {shop=”shopping”}.
Click on “load default text” to restore defaults.
Free shipping acquired -epending on your display settings, this message will be displayed in Minicart (with progress bar) and Cart (plain text) when users qualify for free shipping. In this case, your customers can proceed to the checkout page with the available text variable. Example: {icon}Great! You have free shipping! Go to {checkout=”checkout”}.
Click on “load default text” to restore defaults
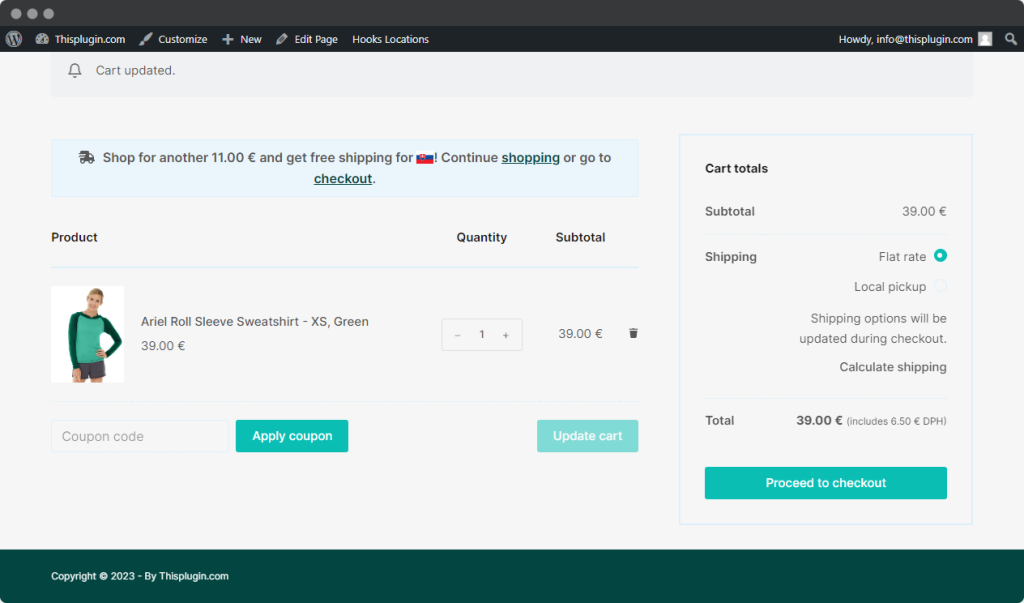
Text variables
- {icon} – Free shipping SVG icon. You can specify the icon in the General settings section and the SVG icon field.
- {flag} – Country flag SVG. The flag icon is automatically added according to the selected shipping zone.
- {min_amount} – Minimum amount to get free shipping. You can configure this in the WooCommerce shipping settings.
- {total_amount} – Total order amount.
- {shop=””} – Link to the shop page, optional parameter with link text.
- {checkout=””} – Checkout page link, optional parameter with link text.
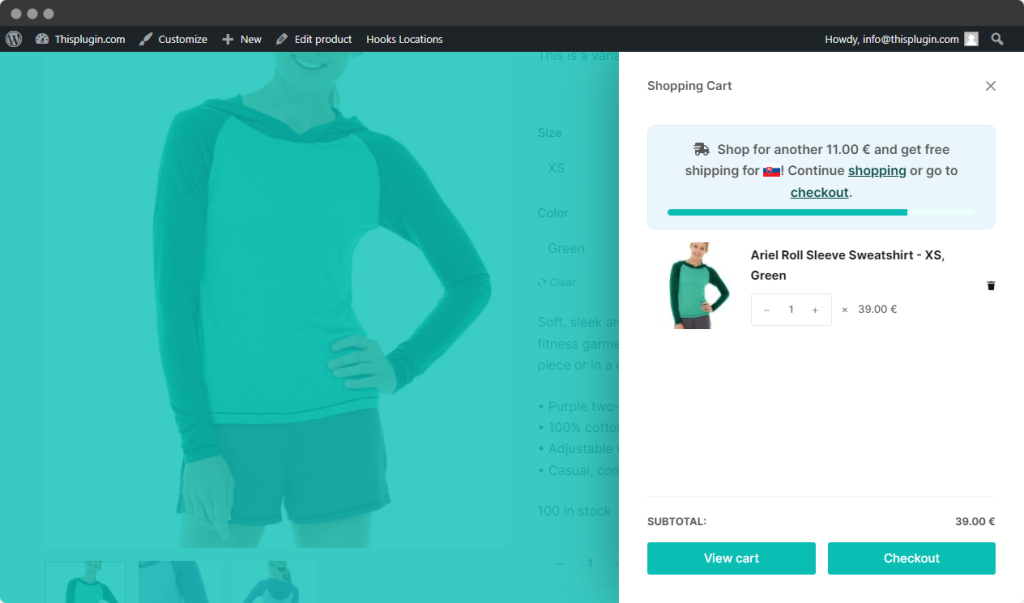
Plugin uninstall
You can uninstall the plugin by clicking “Uninstall” in the ThisPlugin Manager. After uninstalling the plugin, all plugin data will be deleted.
Shortcodes
Learn how to set up shortcodes and display them anywhere on your page.
You can use the shortcodes to display the Free Shipping Bar anywhere on the page. Add [futurbox_fsr /] to display the Free Shipping Bar widget wherever you want.
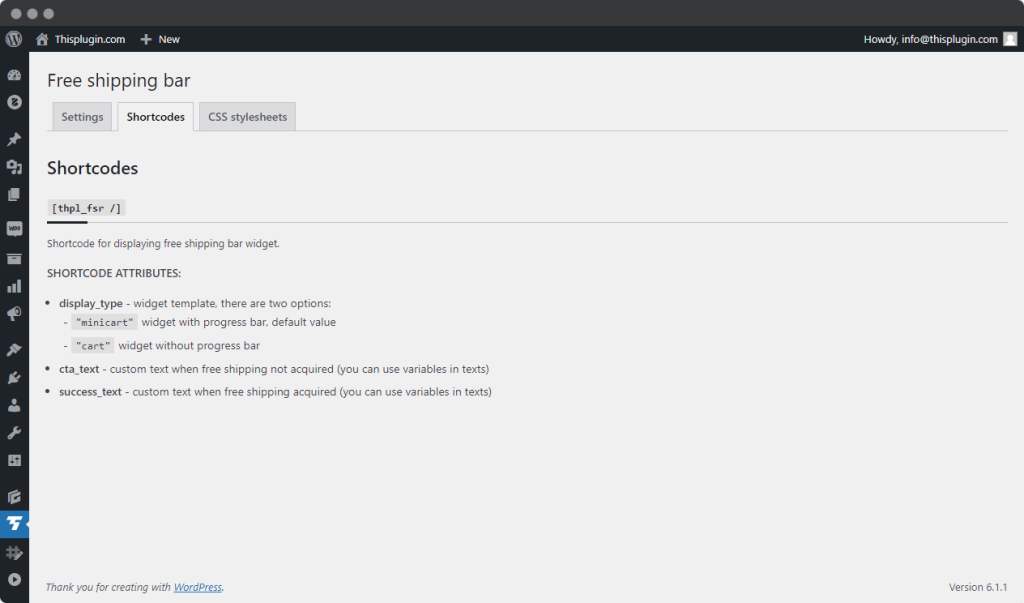
You can use attributes to personalize the shortcode:
- display_type – widget template, there are two options: “minicart” widget with progress bar – it’s a default value, “cart” widget without progress bar.
- cta_text – custom text when free shipping not acquired (you can use variables in text).
- success_text – custom text when free shipping acquired (you can use variables in text).
Example: [futurbox_fsr display_type=”cart” /] displays widget without a progress bar
CSS stylesheets
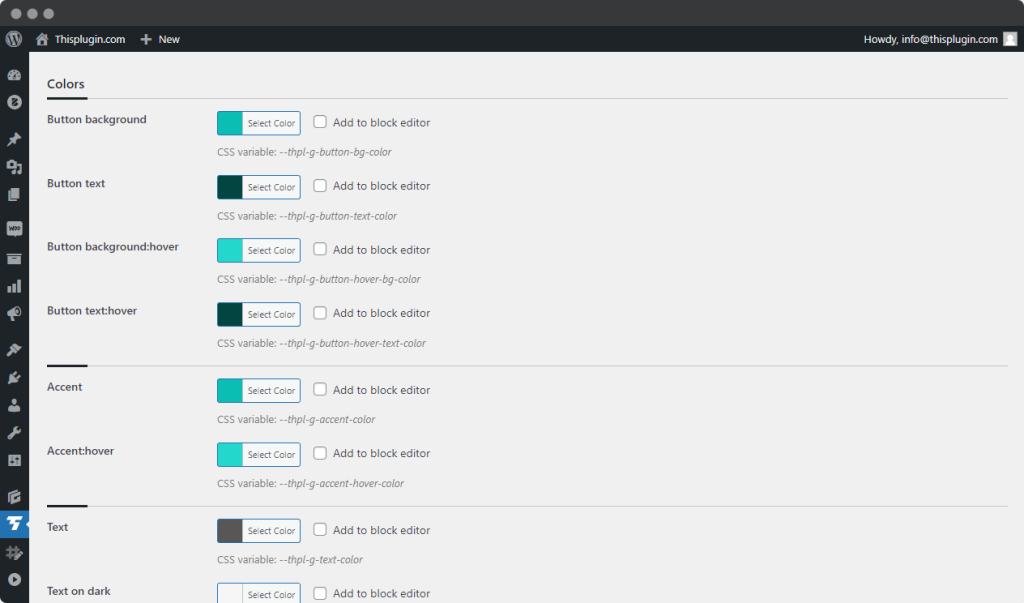
This tab gives you full control over the CSS of your widget on the web. However, these settings are intended for advanced users and developers only.
We recommend beginners to change the look of the widget using Global Styles in the ThisPlugin Manager.
If you make a change you are not happy with, you can always restore the default CSS that comes with the plugin. Just click on the Load default CSS link.
Don’t forget to save your settings by clicking the Update button.
Need help?
Submit a ticket
Need help setting up the plugin? Submit a ticket in our support center and we will help you.
Feature request
Didn't find the feature you were looking for? Send us a request and we will consider adding it.
Changelog
The changelog lists all the new features, enhancements and fixes already released.
Roadmap
In the roadmap you will find a list of all planned or user-proposed features.